
Shop Now
Institutional page for the HOMCOM brand hub.
Quick Answer:
A DIY butcher block island can be built around a simple structure: a butcher block countertop, a stable base, appropriate fasteners, and a finish suited to how the surface will be used. The main decisions are how much customization you need, how the island will function, and how the finished dimensions will fit your kitchen.
For a simpler project, a precut butcher block can be installed on a ready-made or straightforward wood base. More advanced DIYers can build a custom top from multiple pieces or raw lumber. Before buying materials, measure the available space, determine the finished countertop height, decide whether the island will provide seating or storage, and account for the thickness of the countertop itself.
If the island will be used for seating, don’t plan only around the countertop’s overall dimensions. NKBA’s kitchen planning guidance gives specific knee-space recommendations based on counter height, including 24 inches of width and 15 inches of depth per diner at a 36-inch-high counter. [1] This gives you a more useful starting point than choosing an overhang by appearance alone.
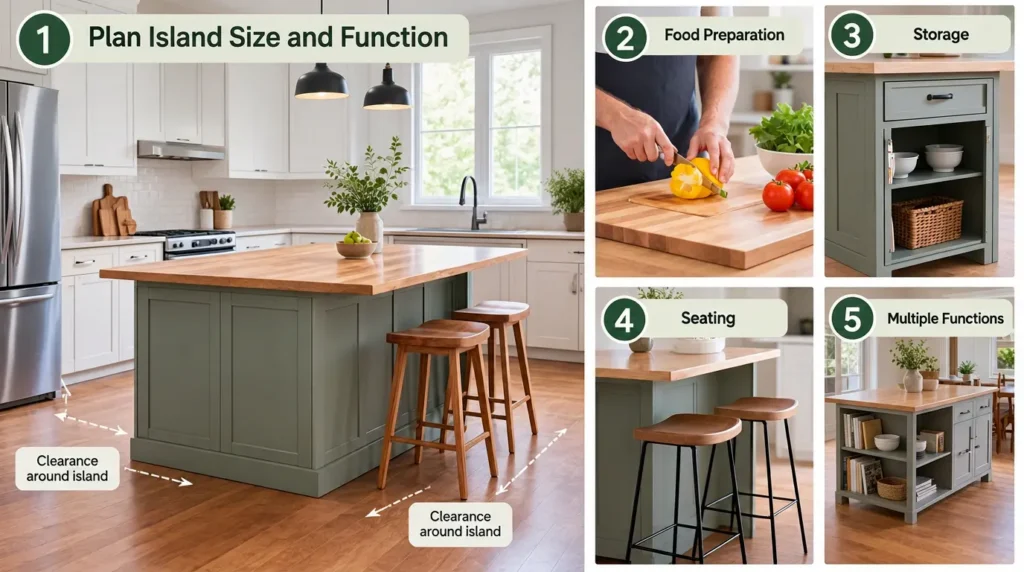
Start with the kitchen rather than the butcher block.
Measure the area where the island will stand and consider how people will move around it. The island should leave enough room for normal kitchen activities, cabinet access, appliances, and traffic rather than simply fitting into the largest available footprint.
Next, decide what you want the island to do:
The final countertop height is determined by the base plus the butcher block thickness, so don’t build the frame first and calculate the height afterward.
If seating is part of the plan, use a recognized planning reference rather than guessing how much space a stool needs. NKBA guidance recommends 24 inches of knee-space width per seated diner, with the required depth changing according to counter height: 18 inches at a 30-inch table/counter, 15 inches at 36 inches, and 12 inches at 42 inches. [1]
These measurements are especially useful because they turn a vague preference such as “I want room for two stools” into an actual planning requirement.
There is no single DIY method that suits every kitchen. Choose the construction approach before purchasing the countertop.
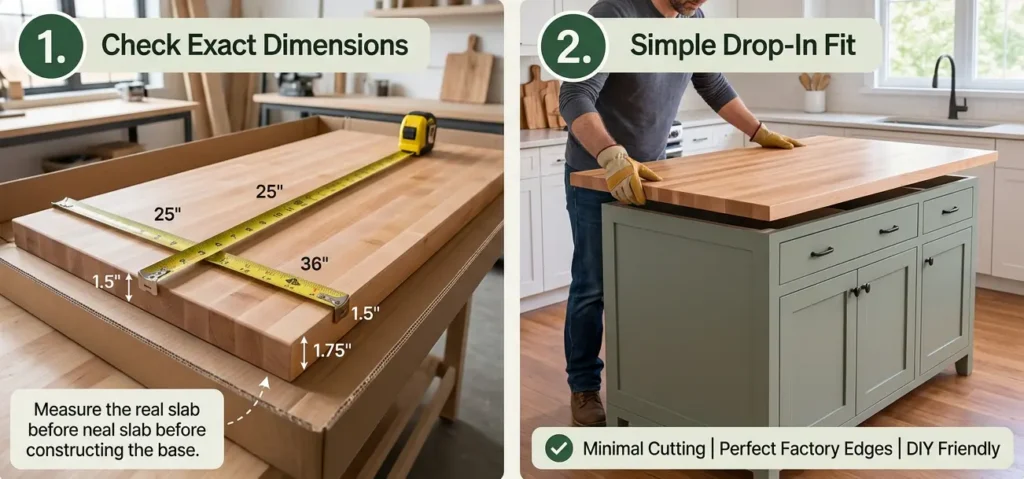
This is the most straightforward approach.
A precut top reduces cutting and joinery work and makes sense when an available size is close to the dimensions you need. It is particularly suitable if your priority is a manageable DIY project rather than maximum customization.
Check the actual dimensions and thickness before designing the base.
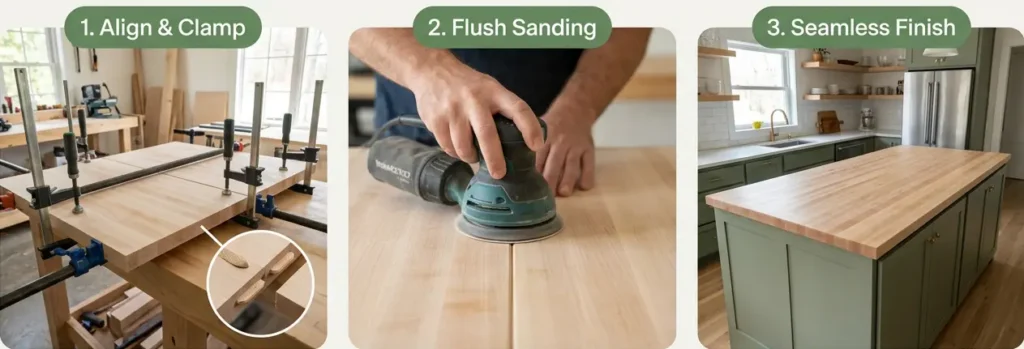
Using multiple butcher block pieces gives you more flexibility when a single standard piece does not provide the required size.
The trade-off is additional work. Pieces need to be aligned and joined carefully, and the finished seam should be sanded and treated so that it does not become the visual focus of the countertop.
This can be a useful middle ground between a standard countertop and a completely custom top.
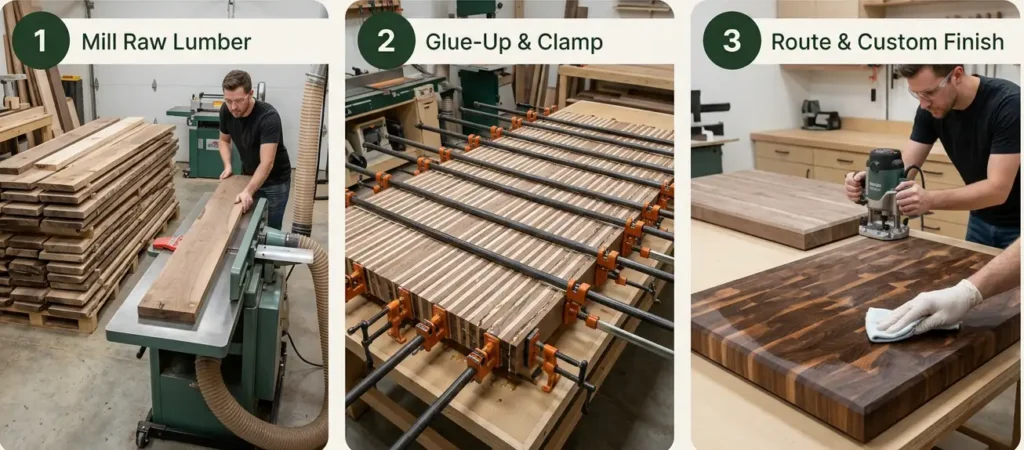
Building the countertop yourself provides the greatest control over wood species, dimensions, thickness, edge treatment, and appearance.
It also requires considerably more woodworking work, including cutting, joining, sanding, and finishing. For a first-time DIYer, the extra customization may not justify the additional complexity.
The practical choice is therefore simple: choose the least complicated approach that still gives you the size and appearance you need.
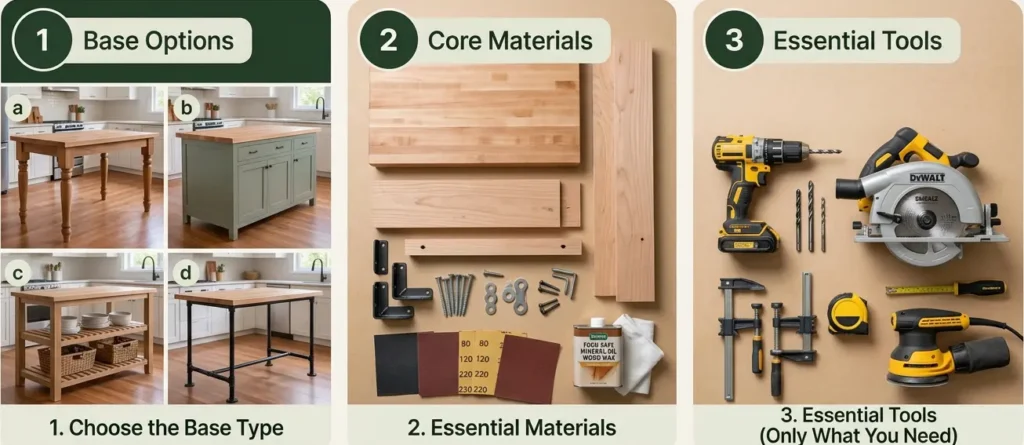
Once the dimensions and countertop approach are decided, prepare the supporting structure.
Common DIY approaches include:
The important question is not which style looks most “DIY.” It is what the base needs to accomplish.
A cabinet base provides enclosed storage. Open shelving keeps frequently used items accessible. A simple leg-and-frame design can reduce construction complexity and create a more furniture-like appearance.
Depending on your chosen design, you may need:
Typical projects may require measuring tools, a drill, a saw, clamps, and a sander. The exact tool list depends on whether you are cutting a precut top, joining multiple pieces, or building the countertop from raw lumber.
There is no benefit in reproducing a professional woodworking shop’s entire tool inventory if the chosen design does not require it.
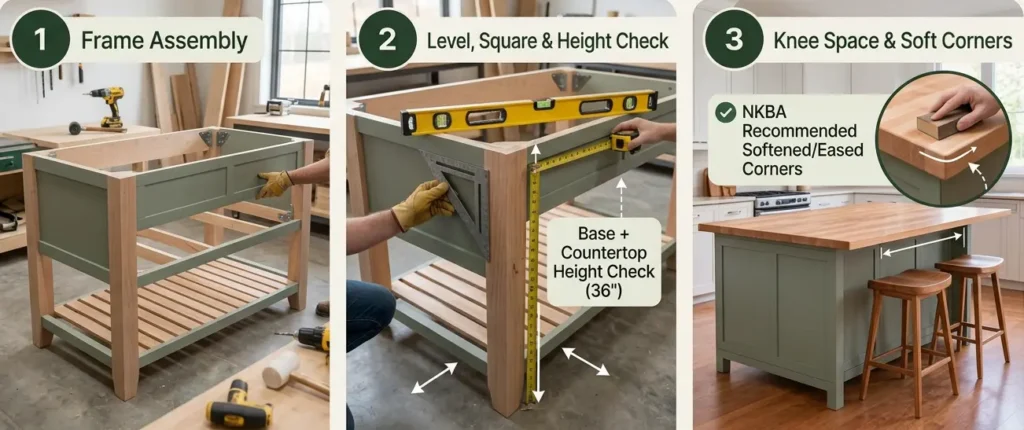
Build the base according to the dimensions established in Step 1.
First, prepare the legs, cabinet components, or other supports. Then assemble the frame or apron that will hold the countertop.
Before moving on, check three things:
If you want storage, add shelves, drawers, or cabinet components at this stage.
If you want seating, make sure the base does not unnecessarily block the planned knee space. This is one reason seating should be considered before the base is constructed rather than added as an afterthought.
For islands with exposed corners, shape also matters. NKBA has specifically advised avoiding sharp countertop corners at islands and peninsulas, which is a useful design consideration when deciding whether exposed corners should be softened or rounded. [2]
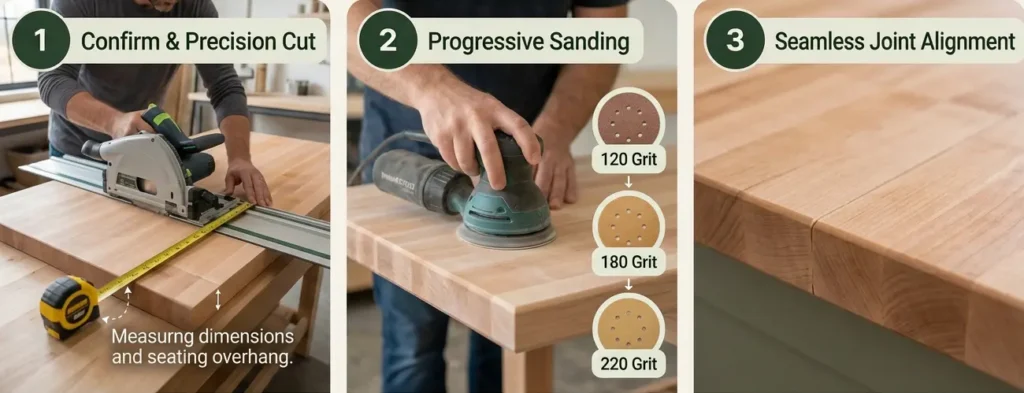
Do not make the final cut until the base and measurements have been checked.
Measure the finished base again and confirm:
Then make the necessary cuts.
Sand the countertop until the working surface and exposed edges are smooth. Pay particular attention to newly cut edges because these will generally require more preparation than factory-finished surfaces.
If you are using several pieces, make sure the joint is aligned before final sanding.
A multi-piece countertop does not have to look improvised. Careful alignment and consistent sanding can make the seam visually unobtrusive.
However, don’t choose a multi-piece approach simply because it appears cheaper or easier. The additional joining and finishing work should be considered when comparing it with a suitably sized precut top.
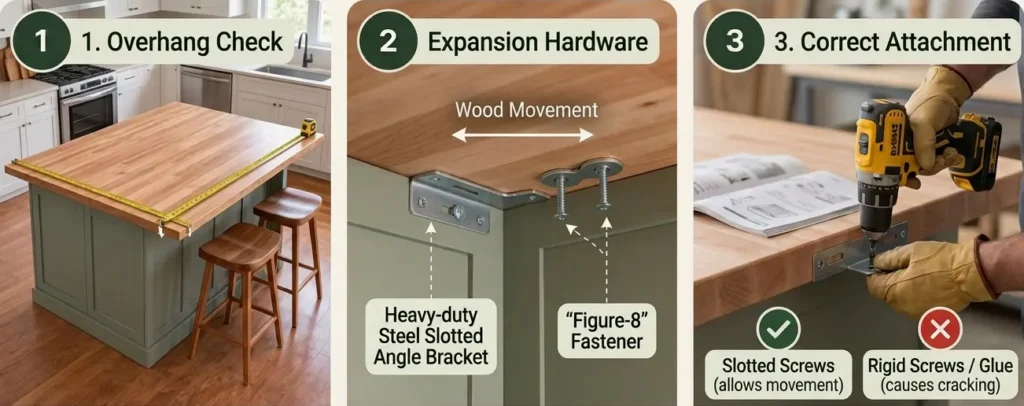
Once the top has been prepared, position it on the base and check the overhang and alignment from all sides.
The attachment method should provide adequate support while accommodating the characteristics of the wood.
This is an important distinction from simply “screwing the top down.” A wood countertop can respond to changes in its environment, so the connection should not unnecessarily prevent the top from moving. Use an attachment method appropriate to the countertop construction and follow the instructions supplied with the butcher block and hardware.
If you are using a manufactured butcher block, follow the manufacturer’s installation requirements first rather than assuming that a method used in a DIY project applies universally.
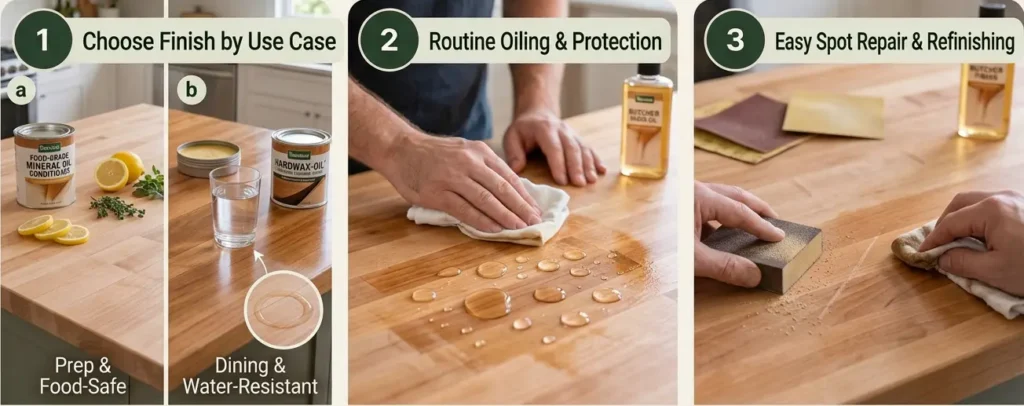
The correct finish depends on how you intend to use the countertop.
A surface used primarily as a kitchen worktop may have different finishing requirements from one intended mainly for serving, dining, or general furniture use.
Possible finishing approaches include:
Don’t choose a finish based only on whether it makes the wood look attractive. Consider the required protection, maintenance routine, and intended use of the surface.
After installation, maintenance should follow the requirements of the finish and countertop manufacturer. If the surface becomes worn or develops minor damage, appropriate sanding and refinishing may restore it, depending on the construction and finish.
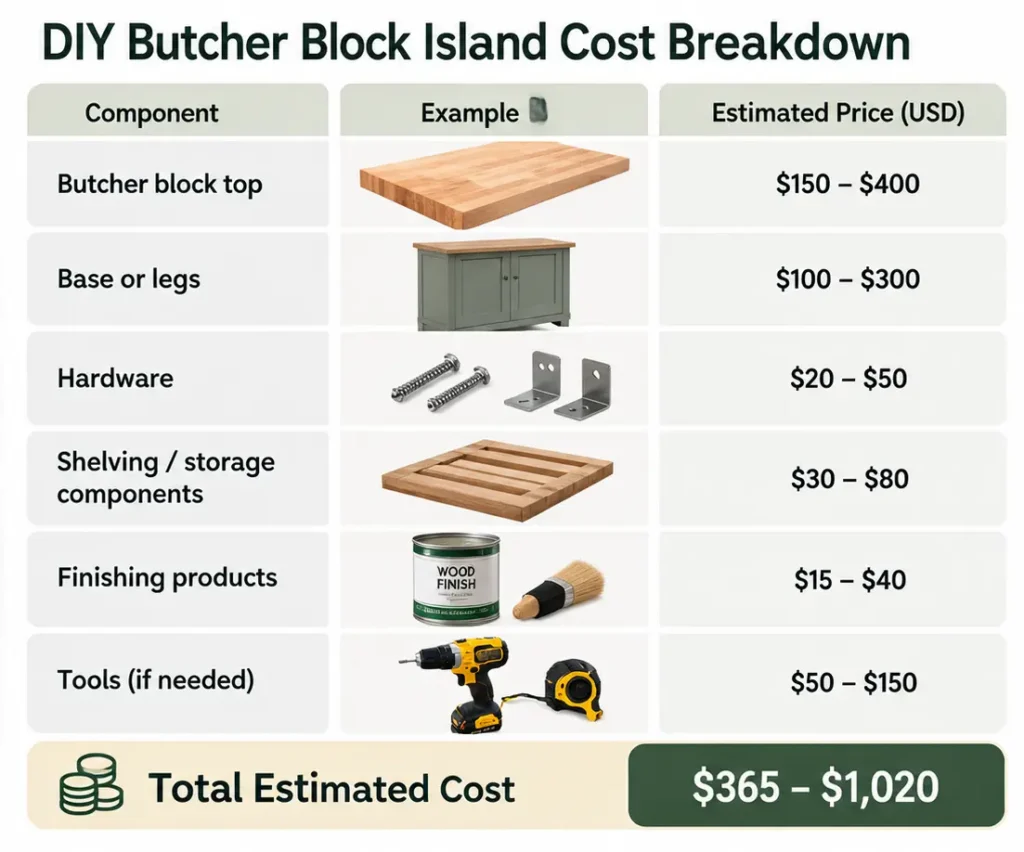
The total project cost is more than the price of the countertop.
Budget for:
The cost can vary substantially depending on whether you use a precut top, combine multiple pieces, or build the countertop yourself.
Only for Reference:
Measuring only the countertop: Plan the complete finished island, including the base and countertop thickness.
Forgetting seating space: A countertop may technically fit stools while still being uncomfortable to use. Plan knee space before fixing the base dimensions.
Ignoring wood movement: The attachment method should account for the behavior of the wooden top.
Choosing the finish too late: The intended finish can affect how the countertop is prepared and maintained.
Overcomplicating the build: A highly customized top is not automatically a better DIY choice. Select the construction method that matches your tools, skills, available time, and required result.
A successful DIY butcher block island starts with planning rather than cutting wood. Decide how the island will function, establish its finished dimensions, choose an appropriate butcher block approach, and then build the base around those requirements.
For most DIYers, the best construction method is not necessarily the most complex one. A well-planned precut top and stable base can provide a practical result with less woodworking, while a custom-built top makes more sense when exact dimensions or a specific appearance are the priority.
Yes, if its dimensions and thickness work with the planned island. Confirm the required countertop size, overhang, and finished height before building the base.
NKBA recommends 24 inches of knee-space width per seated diner. The recommended depth varies with counter height, including 15 inches at a 36-inch-high counter and 12 inches at a 42-inch-high counter. [1]
Use an appropriate fastening method that securely supports the top while allowing for the natural movement of the wood. If using a manufactured countertop, follow its installation instructions rather than copying a generic DIY method.
The appropriate treatment depends on how the countertop will be used and which finish is selected. Choose a product based on its intended application and follow the manufacturer’s maintenance instructions.
It can be, but the answer depends on the countertop, base, hardware, finishing materials, and tools required. DIY also adds your own labor and finishing time, so compare the complete project cost, not just the price of the butcher block.
[1] National Kitchen & Bath Association (NKBA), Kitchen Planning Guideline 9: Seating Clearance.
[2] National Kitchen & Bath Association (NKBA), Steps to a Safe Kitchen.